Cloudflare Setup Guide
This guide covers how to configure Cloudflare Tunnel for secure remote access to GenMaster.
Table of Contents
- Overview
- Prerequisites
- Creating a Tunnel
- Docker Configuration
- DNS Configuration
- Security Considerations
- Troubleshooting
Overview
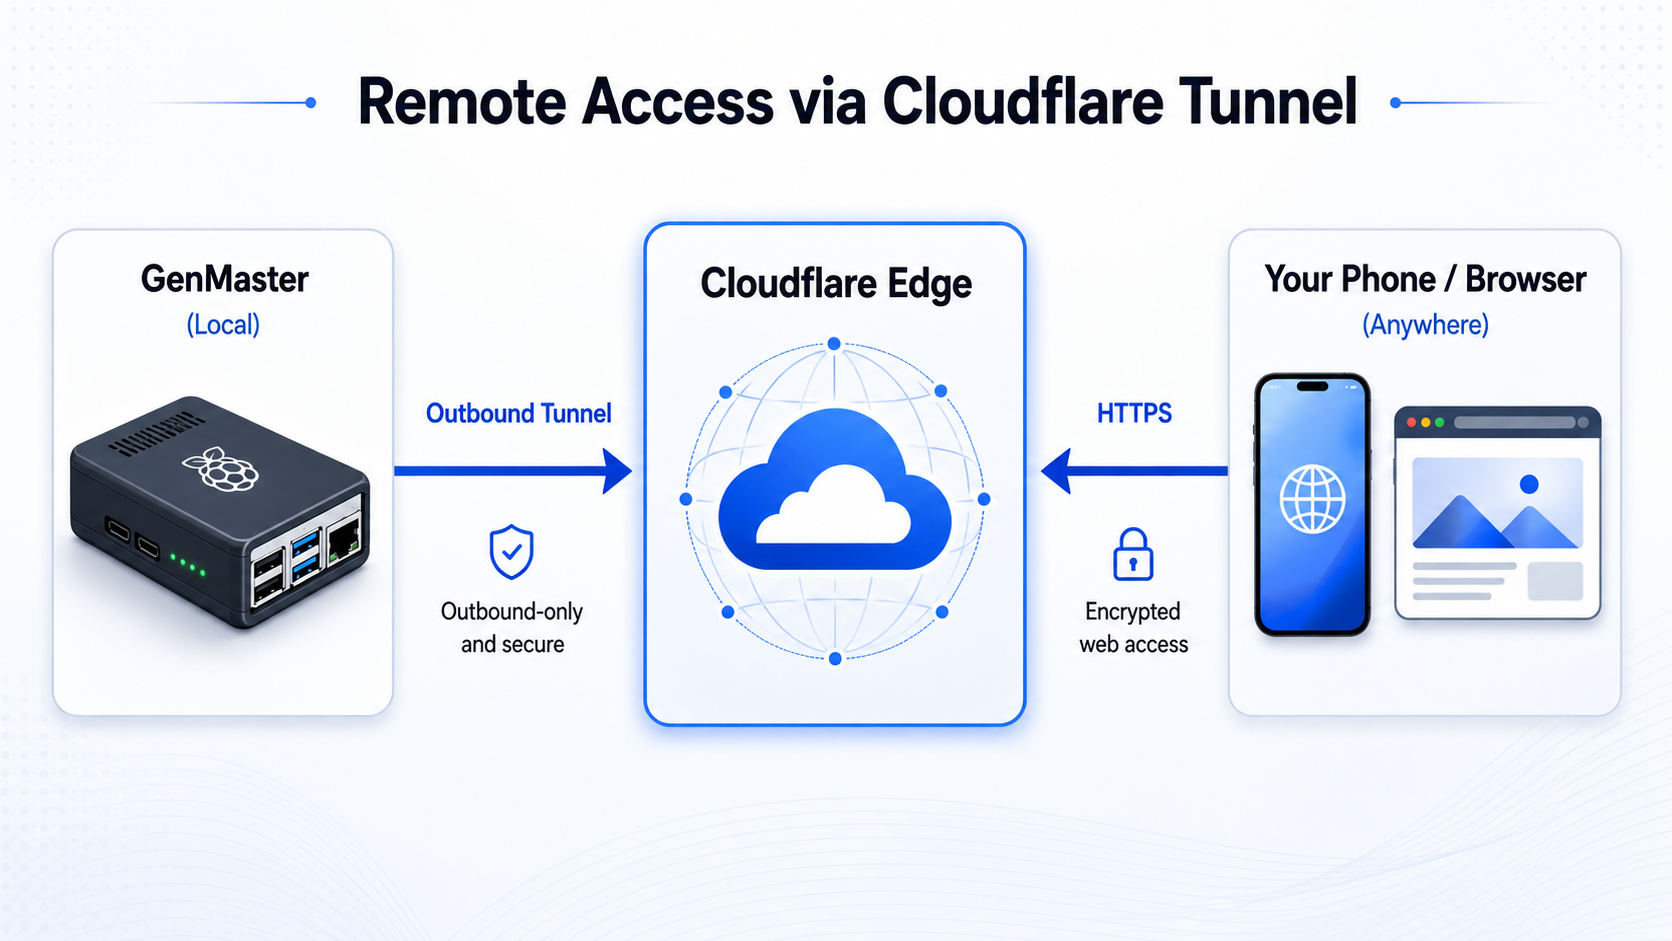
Cloudflare Tunnel provides secure remote access to GenMaster without exposing ports on your router or requiring a static IP address.
Benefits
| Feature | Description |
|---|---|
| No port forwarding | Tunnel connects outbound to Cloudflare |
| Built-in SSL | Automatic HTTPS with Cloudflare certificates |
| DDoS protection | Cloudflare's network protects your origin |
| Zero Trust | Optional Access policies for authentication |
| No static IP | Works with dynamic IP addresses |
Architecture
Prerequisites
- Cloudflare account (free tier works)
- Domain name added to Cloudflare
- Docker running on GenMaster
Creating a Tunnel
Step 1: Access Zero Trust Dashboard
- Log in to dash.cloudflare.com
- Navigate to Zero Trust (or one.dash.cloudflare.com)
- Go to Networks > Tunnels
Step 2: Create the Tunnel
- Click Create a tunnel
- Select Cloudflared as the connector
- Name your tunnel (e.g.,
genmaster-tunnel) - Click Save tunnel
Step 3: Get Your Token
After creating the tunnel, you'll see a token. It looks like:
Copy this token - you'll need it for Docker configuration.
Step 4: Configure Public Hostname
- In the tunnel settings, click Public Hostname
- Add a hostname:
- Subdomain:
generator(or your choice) - Domain: Select your domain
- Service Type:
HTTPS - URL:
nginx:443 - Under Additional settings:
- Enable No TLS Verify (for self-signed certs)
- Or use HTTP if preferred
Docker Configuration
Environment Variable
Add to your .env file:
Docker Compose
The cloudflared service is defined with a profile:
cloudflared:
  image: cloudflare/cloudflared:latest
  container_name: genmaster_cloudflared
  command: tunnel --no-autoupdate run
  environment:
    - TUNNEL_TOKEN=${CLOUDFLARE_TUNNEL_TOKEN}
  restart: unless-stopped
  networks:
    - genmaster-external
  profiles:
    - cloudflare
Starting the Tunnel
# Start with Cloudflare profile enabled
docker compose --profile cloudflare up -d

# Check tunnel status
docker compose logs cloudflared

# Verify tunnel is connected
docker compose ps cloudflared
Verifying Connection
- Check Cloudflare Dashboard: Tunnel should show Healthy
- Visit your hostname:
https://generator.yourdomain.com - Check logs:
docker compose logs -f cloudflared
DNS Configuration
Automatic (Recommended)
When you add a public hostname to your tunnel, Cloudflare automatically creates a CNAME record pointing to your tunnel.
Manual Configuration
If you need to configure DNS manually:
- Go to DNS in Cloudflare Dashboard
- Add a CNAME record:
- Name:
generator - Target:
<tunnel-id>.cfargotunnel.com - Proxy status: Proxied (orange cloud)
Security Considerations
Cloudflare Access (Optional)
For additional security, add authentication via Cloudflare Access:
- Go to Zero Trust > Access > Applications
- Click Add an application
- Select Self-hosted
- Configure:
- Application name: GenMaster
- Subdomain:
generator - Domain: Your domain
- Add an Access Policy:
- Rule action: Allow
- Include: Emails ending in
@yourdomain.com - Or use one-time PIN, Google auth, etc.
IP Restrictions
The tunnel accepts all traffic from Cloudflare. For additional security:
- Configure Nginx to only accept Cloudflare IPs
- Or use Access policies as described above
Firewall
Since the tunnel connects outbound, you don't need to open any ports. However, ensure:
- Outbound HTTPS (443) is allowed
- The cloudflared container can reach the internet
Multiple Services
You can route multiple services through one tunnel:
GenMaster Web UI
Portainer (Optional)
API Only
Troubleshooting
Tunnel Not Connecting
-
Check token:
Verify it matches the dashboard. -
Check container logs:
-
Check network access:
502 Bad Gateway
The tunnel is connecting but can't reach your service:
-
Check nginx is running:
-
Verify service URL:
- Should be
nginx:443orgenmaster:8000 -
Not
localhost(containers are isolated) -
Check TLS settings:
- Enable "No TLS Verify" for self-signed certs
- Or configure proper certificates
Tunnel Keeps Reconnecting
- Check for conflicts:
-
Only one cloudflared should run per tunnel
-
Check resources:
-
Update cloudflared:
Access Denied (403)
If using Cloudflare Access:
- Check your email is in the allowed list
- Clear browser cookies
- Try incognito mode
- Check Access policy configuration
Maintenance
Updating Cloudflared
Rotating Tunnel Token
- Go to Cloudflare Dashboard
- Delete the old tunnel
- Create a new tunnel
- Update
CLOUDFLARE_TUNNEL_TOKEN - Restart cloudflared
Disabling Tunnel
# Stop cloudflared only
docker compose --profile cloudflare stop cloudflared

# Or start without cloudflare profile
docker compose up -d  # Doesn't include cloudflare profile
Best Practices
- Use Access policies for authentication
- Monitor tunnel health in Cloudflare Dashboard
- Set up alerts for tunnel disconnections
- Keep cloudflared updated for security patches
- Use separate tunnels for production and development
Next Steps
- Tailscale Setup - VPN alternative for local network
- Notifications - Get alerts for system events
- Troubleshooting - Common issues and solutions